
Parts and contaminants · 6 min read · Updated 2026-11-16
Cleaning starter and alternator housings
Cleaning stripped starter and alternator housings: choose an aluminium-compatible bath, protect bearing seats, rinse passages and verify drying.
Technical guide. Figures are taken from our own spec tables; for your process we confirm the settings with a cleaning trial.
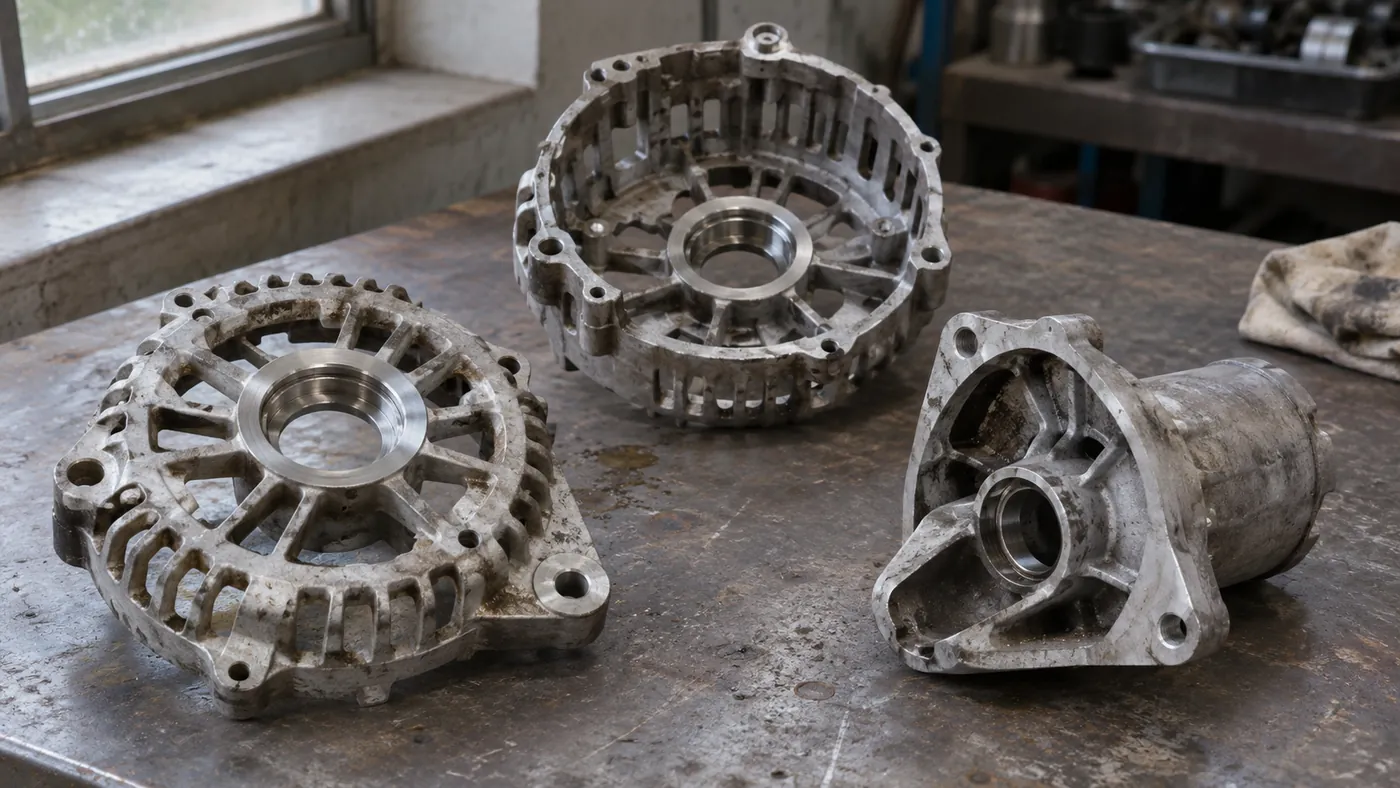
A stripped alternator end housing is a different cleaning job from a complete electrical unit. Oil and road dirt sit between the cooling ribs, while bearing seats, threaded holes and machined mounting faces must stay fit for measurement. Starter housings can add steel parts and corrosion to that mix. The process therefore begins at dismantling, before a basket reaches the bath.
How should starter and alternator housings be cleaned for remanufacturing? Clean stripped housings in an aqueous detergent rated for their alloy and finish, using 40 kHz as the starting frequency for aluminium. Expose ribs and holes to the liquid, rinse away detergent, then drain and dry before dimensional inspection and reassembly.
What must come off before a housing enters the bath?
Only the stripped housing enters the aluminium cleaning process; windings, rectifiers, regulators, bearings and grease remain separate. A 40 kHz bath is a starting choice for the bare aluminium shell, not permission to immerse an assembled alternator. Identify retained inserts and coatings before selecting the cleaner, because every wetted material must tolerate the process.
Follow the dismantling instructions for the particular unit. A housing that looks bare may still carry a bearing seal, insulating bush or bonded label. Remove loose debris without driving it into a bearing seat. Keep the parts of each unit together in a carrier that does not trap liquid against the surface.
Photograph corrosion, cracked ribs and damaged mounting ears before washing. Cleaning reveals a surface; it does not repair it. The brake-caliper remanufacturing guide makes the same split between cleaning and deciding on reuse. Its settings are for cast iron and do not transfer to aluminium housings.
Which bath protects aluminium while removing oily dirt?
For aluminium housings, use a cleaner its maker rates for light alloys, usually pH 9 to 11 with inhibitors, at 40 kHz. Strong alkali etches aluminium grey within minutes. Most oils and greases loosen between 50 and 70 °C
Why 40 kHz: the smaller cavitation bubbles reach further into threads, small bores and fine features, and erosion on soft metals such as aluminium stays low. 28 kHz suits heavy soil on robust castings. The ST-96 tank is built for either frequency, so choose it by the main load: for aluminium housings, that is 40 kHz.
Separate grease from corrosion on the incoming part. An oily film needs degreasing chemistry; a dark corrosion mark may remain after the oil is gone, and repeated washing attacks the sound metal around it. Do not put acid derusters or chloride-containing products in the tank: they pit AISI 304 stainless steel. Use them only in a beaker or insert tank, or in a tank ordered in AISI 316.
Record the detergent, dilution, measured bath temperature and time for each run, and inspect between short runs. The cleaning-liquids guide covers material compatibility in detail.
How should ribs, bearing seats and blind holes face the liquid?
Load aluminium housings one by one so ribs stay apart and blind holes can fill in the 40 kHz bath. Angle pockets so air escapes during immersion, then turn them openings down for draining. A housing resting on another leaves a dirty contact patch and a trapped pool that can reach a bearing seat.
Support the housings on robust casting features, away from the surfaces used to judge bearing fit. Do not stack them because the total weight is low: a basket of light castings loses liquid access long before its 100 kg
If only the contact patch stays dirty, change the fixture before adding time or temperature. Keep a photo of the accepted loading with the process record so the next operator can repeat it.
Which wash and drying sizes can be compared?
The ST-96 heated ultrasonic tank (96 L
| Model | Nominal volume (L) | Basket L × W × H (mm) | Basket load (kg) | Frequency (kHz) | Air temperature (°C) |
|---|---|---|---|---|---|
| ST-96 | 96 |
580 × |
100 |
28 or 40 | – |
| DT-96 | 96 |
580 × |
100 |
– | 30 to 100 |
Source: Sonixtek products.json and live product-copy snapshot, read 16 Nov 2026; matching rows only.
The table describes the equipment, not how many housings fit in a batch. Count them from a real layout with gaps and supports. Oily housings load the bath every day: in the SF filtration range a pump draws the bath through a filter and a skimmer takes floating oil off the surface, so oil does not settle back onto the next batch. Topping up does not do that. The ST tank range is the single-tank starting point.
Rinsing, drying and release
Rinse the ribs and holes before detergent dries on them. A warm rinse at 40 to 60 °C
Steel parts on starter housings need a corrosion inhibitor in the bath or the last rinse, and drying straight away: wet steel in warm air can flash-rust within an hour. In the dryer, water left in blind holes usually means holes faced up; turn the parts. A thermostat reading does not show that a threaded hole is dry, so let a sample housing cool, turn it over a clean tray and look for water.
Then make three separate checks: residual soil, residue, and the bearing seats and mounting features measured under your remanufacturing procedure. Keep accepted parts in a clean carrier away from incoming oily units. More detail: rinsing and drying, the dryer selection guide and other dismantled components in automotive.
Frequently asked questions
Can an assembled alternator go into this bath?
No, this process is for stripped housings. Windings, electronics, bearings and grease add materials and trapped spaces that a bare-casting process does not cover. Follow the unit's dismantling procedure and check any retained insert or coating before the housing enters the bath.
Does a dark bearing seat need a longer cycle?
First find out whether the mark is soil, corrosion or chemical attack. Longer exposure can etch the surrounding aluminium and still leave a corrosion mark visible. Cleanliness and bearing-seat condition are separate decisions; inspect and measure the seat before accepting it for reuse.
How do I check whether a pocket is dry?
After drying, let a sample housing cool and turn it over a clean tray. Look for water in blind holes and between ribs. Check the housing in the least exposed position in the carrier, and record that loading orientation with the accepted process.
What to send us for a quote
Send the housing materials, retained inserts, largest dimensions, photos of the ribs and bearing seats, the incoming soil and housings per shift. Add the inspection step that follows, your carrier layout, power supply and floor space for wash, rinse and dry.
Use the quote form. Our technical team compares your carrier with the wash basket and the DT drying range, and names what to test on your own housings.