Parts and contaminants · 4 min read · Updated 2026-09-30
Cleaning electronic modules after repair with ultrasound
Rework flux, corrosion after liquid damage and old dust: how to clean a repaired module, what to remove first, and why solvents never go in a heated tank.
Technical guide. Figures are taken from our own spec tables; for your process we confirm the settings with a cleaning trial.
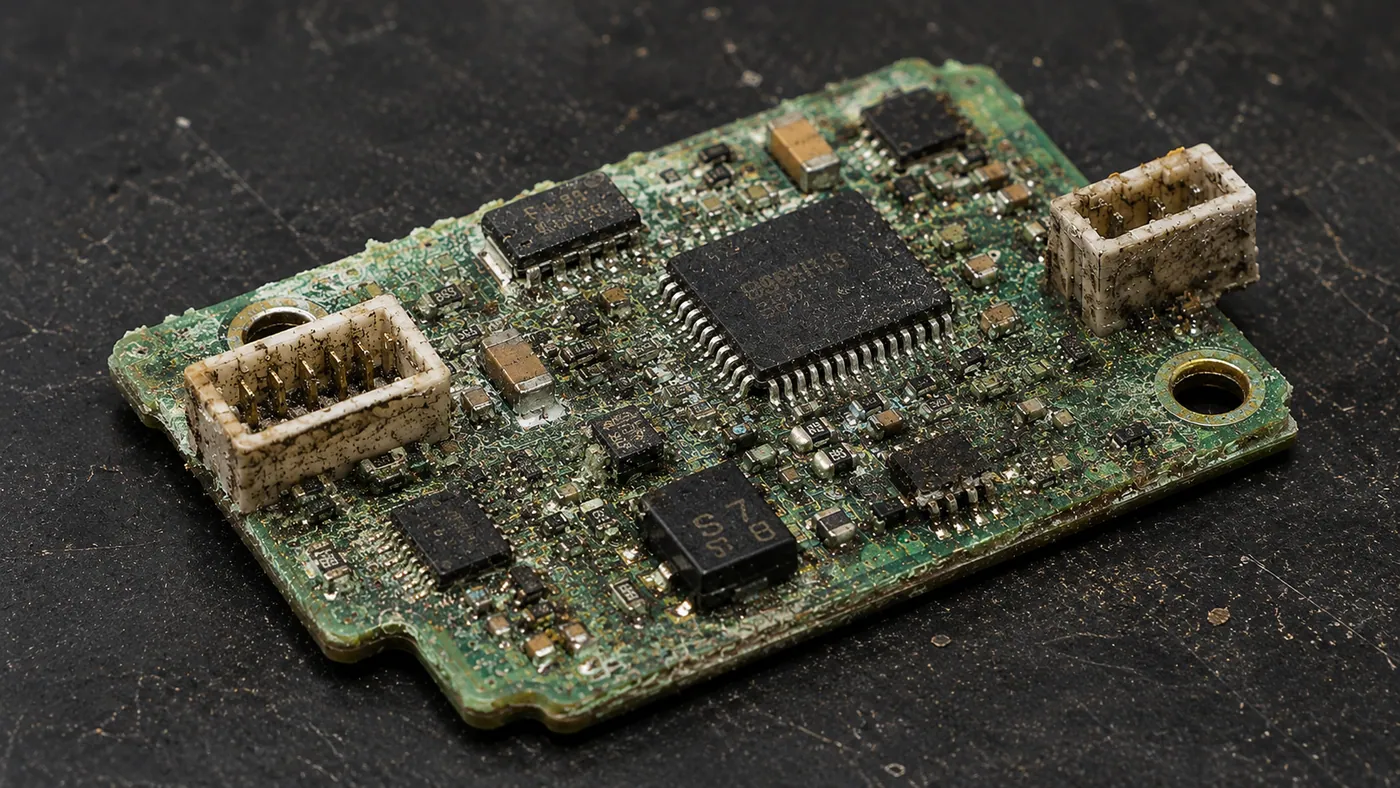
A module on a repair bench is not a new board. It has a history: dust and grease from years in a control cabinet or a vehicle, perhaps a liquid spill and the corrosion that followed, and now the flux from the rework that replaced the faulty part. Cleaning it well decides whether the repair lasts. Cleaning it badly can turn a repaired module into one that fails again within weeks.
Rework flux
Hand rework leaves more flux than a production process, and it leaves it unevenly. Flux from a flux pen, a gel or cored wire spreads beyond the joint, and part of it never reaches soldering temperature. No-clean flux is designed to become benign when it is fully heated during soldering. Flux that stayed cool at the edge of the rework area can remain active: sticky, ionic and corrosive in humid air. That is why "no-clean" does not mean "leave it" after hand rework, especially on modules for vehicles, outdoor equipment or high voltage.
The chemistry for each flux type is in removing flux residues. For repair work, an aqueous flux remover at 45 to 55 °C, 40 kHz, 3 to 5 minutes, followed by a deionised rinse, removes both the rework flux and the older residue on the rest of the board.
Corrosion after liquid damage
When a powered board gets wet, the water and the ions it dissolves carry current between conductors. Metal dissolves at one conductor and deposits at another; within hours there is green or white corrosion around component pins, under chips and on vias. Once the board dries, the corrosion products stay, and they are both ionic and conductive in humid air.
The order of work matters:
- Disconnect power and remove the battery at once. Every minute with voltage applied makes it worse.
- Strip the module. Remove the battery, backup cells and coin cells, displays, speakers and microphones, and any part that must not be cleaned; see the precision electronics risk guide. Remove shields where possible, so the liquid reaches the components underneath.
- Clean. 40 kHz, flux remover or a cleaner intended for corrosion residue on electronics, 45 to 55 °C, 3 to 6 minutes. The ultrasound lifts corrosion products from under components where a brush does not reach.
- Rinse twice in deionised water, the first with ultrasound.
- Dry thoroughly, in warm filtered air at 50 to 60 °C, for 30 minutes or more, longer for boards with BGAs and shielded areas.
- Inspect under a microscope. Look for tracks and pads eaten through, and component legs dissolved at the body. Cleaning removes corrosion products; it does not restore metal. Repair damaged tracks before the module is powered.
- Test before the module goes back into service.
Liquid-damaged boards often need a second cycle after inspection, when the first pass has revealed corrosion that was hidden under residue.
Flammable solvents never go in an open heated tank
Many repair benches have isopropyl alcohol and other solvents at hand, and it is tempting to pour them into the ultrasonic tank. Don't. Ultrasound turns the liquid surface into a fine mist, the tank heater is an ignition source, and the room fills with vapour. Petrol, thinners, acetone, white spirit and alcohols are never used in an open heated ultrasonic tank.
If a solvent is needed, use the indirect method: a small, closed beaker of solvent standing in a water-filled tank, heating off, in a ventilated area, and only with a solvent whose data sheet permits ultrasonic use. Water-based cleaners in the tank itself are the safer default. The safety article covers the other hazards.
Other residues on returned modules
| Residue | Where from | What to do |
|---|---|---|
| Dust with oil mist | Control cabinets, machines, vehicles | Aqueous cleaner, 40 kHz; soak first if the layer is thick |
| Old conformal coating | Original production | Ultrasound does not remove a sound coating; local removal with the coating maker's stripper, then clean |
| Thermal paste | Heat sinks, power parts | Wipe off the bulk first, then clean |
| Nicotine and kitchen grease | Consumer devices | Alkaline cleaner rated for electronics, then thorough rinse |
Connectors on the module need extra drying time for their pin cavities; see connectors.
After cleaning
If the module was conformally coated, recoat the reworked and cleaned area once it is dry; see the coating step in cleaning circuit boards after soldering. Refit the parts that were removed, with a new battery if the old one was exposed to liquid. Record what was cleaned and how, so the next repair on the same module type starts from a known process.
Which machine
| Work | Set-up |
|---|---|
| Phones, handheld devices, small modules | STS-030 (3 L) or STS-060 (6 L), 40 kHz, a second unit or beaker for the deionised rinse |
| Control boards, automotive and industrial modules | STS-090 (9 L) to STS-150 (15 L), 40 kHz, rack for boards on edge |
| Larger boards and repair shops with volume | STS-200 or STS-300 (500 × 300 mm tank), or UMX Pro 50L with stored programmes per module type |
Drying for all of these: a drying cabinet with filtered warm air. The electronics industry page collects the related articles.